Wireless Connection Guide - Windows Vista
NOTE: Primus does not support 3rd party wireless routers, wireless adaptors, or problems in your wireless network. We would kindly refer you to your wirless router's technical support department for assistance in wireless problems.
Two methods exist for setting up a wireless connection on Vista. This guide assumes your Wi-Fi router or access point is already setup and running on the Network and your PC or Laptop wireless card has been installed. Before you can get started with setting up a Wi-Fi connection, the following information will be needed from your wireless router or access point:
- Wireless Network Name (SSID)
- Security Mode or Type (WEP, WPA, WPA2, etc..)
- Encryption Type if using WPA or WPA2 (AES, TKIP)
- Security Key or PassPhrase
Automatic Setup For Wireless Connection:
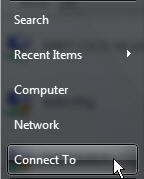
- Click on the Start button and select Connect To from the menu on the right to
display the Connect to a network dialog box.
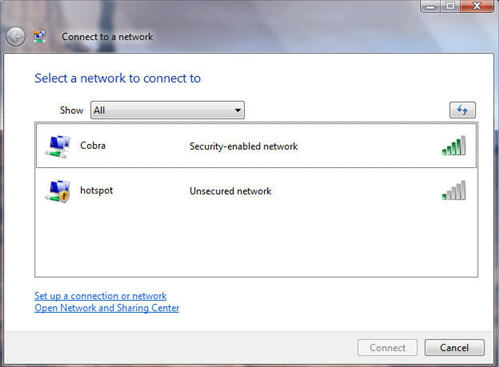
- The list of available networks will depend on the types of wireless networks
detected, such as infrastructure mode or ad hoc mode networks. If you see the name
of your Network, double click it to proceed to the next screen. If you see other
Networks in the list, they are most likely those of other businesses around you. If
you do not see your Network, follow the steps described below for Manually Setup A
Wireless Connection below.
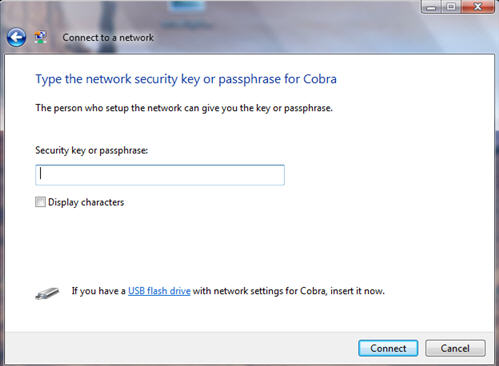
- Enter Security Key or PassPhrase (from the information found from your router
or access point). Check Display Characters to view characters/numbers being typed.
Click Connect.
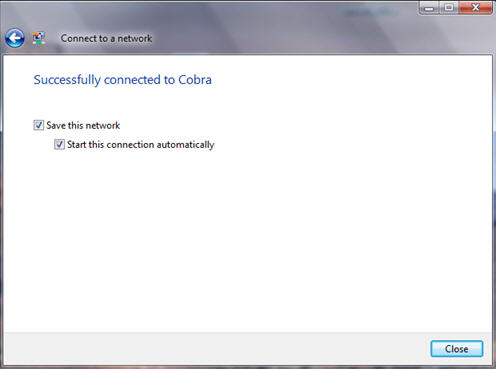
- At the next screen, Vista will attempt to connect to your wireless router or
access point. Once the connection is established, you will be prompted to save your
connection by checking the Save this network and Start this connection
automatically boxes.
Manually Setup A Wireless Connection:
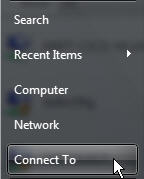
- Click on the Start button and select Connect To from the menu on the right to
display the Connect to a network dialog box.
- The list of available networks will depend on the types of wireless networks
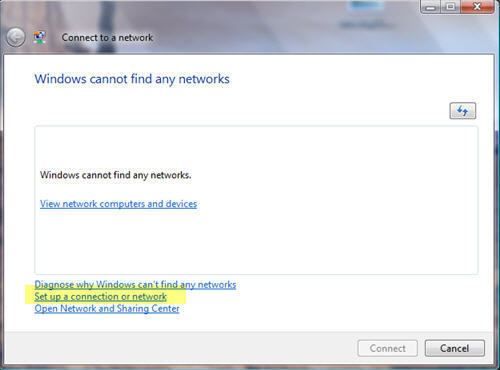
detected, such as infrastructure mode or ad hoc mode networks. If you do not see
your network in the list, or if no networks can be found, Vista displays Windows
cannot find any networks, then your Wi-Fi router may be set for non-broadcast mode.
If this is the case, select Setup a connection or network.
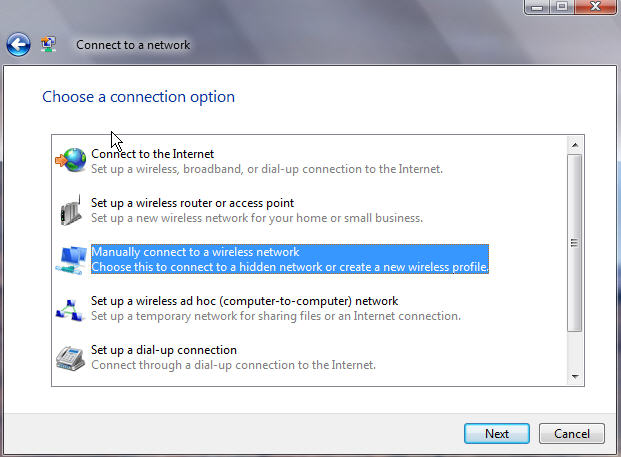
- On the Choose a connection option page, six options are available. Select the
Manually connect to a wireless network option, then click Next.
- The Wizard displays the following:
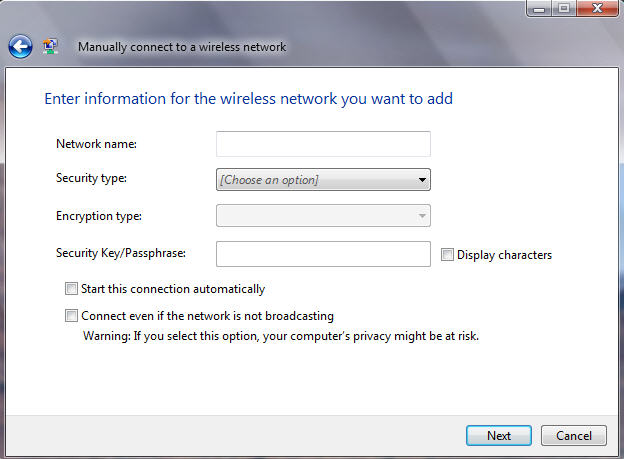
In the "Enter information for the wireless network you want to add" page, configure the following using the above information you obtain from your wireless network or access point:
A) Network name (SSID)
B) Security type (used to authenticate a connection to a wireless network). Choices are dependent on the capabilities of your wireless network adapter:
- No authentication (Open) Open system authentication with no encryption
- WEP Open system authentication with Wired Equivalent Privacy (WEP)
- WPA-Personal Wi-Fi Protected Access (WPA) with a preshared key (also known as a passphrase)
- WPA-Enterprise WPA with IEEE 802.1X authentication
- WPA2-Personal WPA2 with a preshared key
- WPA2-Enterprise WPA with IEEE 802.1X authentication
- 802.1x IEEE 802.1X authentication with WEP (also known as dynamic WEP)
NOTE: The shared key authentication method is not listed. Microsoft strongly discourages its use since it provides weak security for your wireless network. To configure shared key authentication, select No authentication (Open) below in step C.
C) Encryption Type (enabled if using WPA or WPA2, select either AES or TKIP).
- When the No authentication (Open) security type is selected, None is selected.
- When the WEP security type is selected, WEP is selected.
- When the WPA-Personal, WPA-Enterprise, WPA2-Personal, WPA2-Enterprise security type is selected, choose either TKIP or AES
- When the WEP (802.1x) security type is selected, WEP is selected.
D) Security Key/Passphrase (check Display Characters to view characters/numbers being typed)
E) Check Start this connection automatically (tells Vista to automatically connect to this wireless network)
F) Check Connect even if this network is not broadcasting
Click Next
- At the next screen click on Connect to...

You have now successfully connected to your Wireless network (click Cancel to close).
You should see your connection in the System Tray (double monitor icon). When you mouse over the connection, it will display your current connection. Right clicking the connection and selecting properties will allow you to select different options such as the Network and Sharing Center.
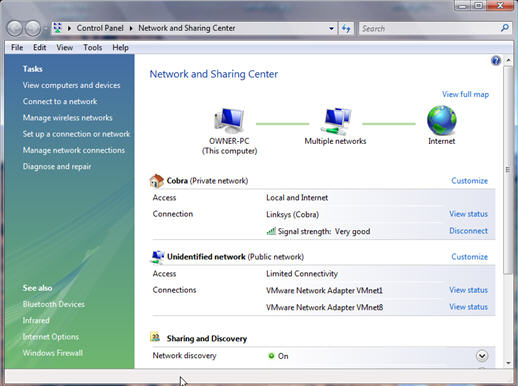
The Network and Sharing Center is the nerve center for you networking tasks. From here you can view all network connection information and make any changes when needed. On the left pane, selecting Manage wireless networks will allow you to make any changes to the connection you just set up above (after clicking Manage wireless networks, right click the connection and select properties).
Selecting Manage network connections will display all network adapters installed on your System. Double clicking on any adapters will display the properties window allowing you to fully manage the adapter and the network connection.
Select Diagnose and repair if you experience problems with your adapter or network connection.Click Close. You will now be connected to the wireless network.
Check network status

